The Animation & Rigging module presented the progress and future plans for Animation 2025, at Blender HQ. This blog post describes that presentation.
Related posts:
by Sybren Stüvel & Nathan Vegdahl
1. The Dream
Where do we want to go with Blender? These desires stem directly from the workshops linked above.
We want to be able to keep animation of related characters / objects together, in one “Animation” data-block. This should include those constraints that are specific to the shot. That will make tightly coupled animation, like Frank, Victor, and the rope above, easier to manage.
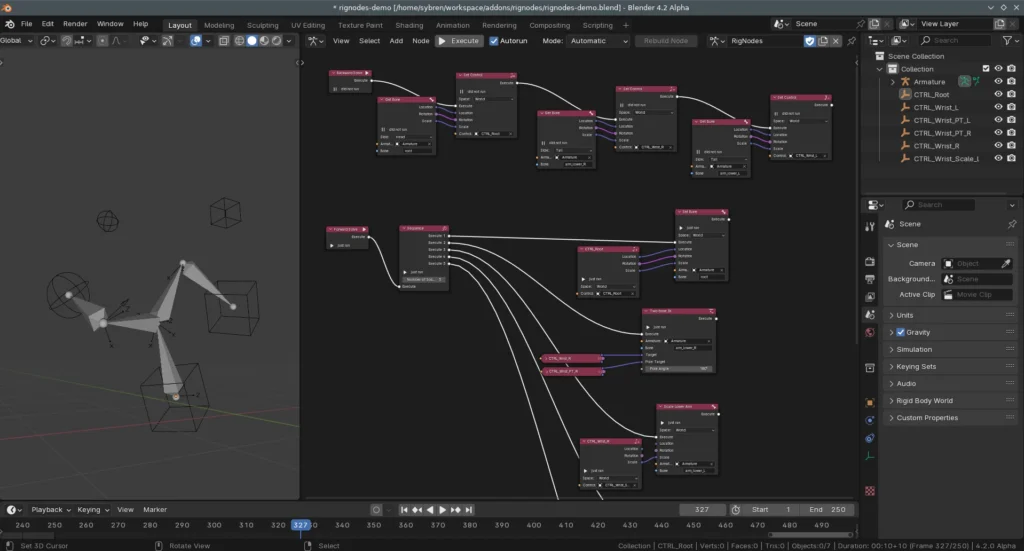
We want to have rigging nodes. Given the desire to keep shot-dependent constraints with the animation data for that shot, it’s likely that these will be somehow implemented with a new rigging nodes system.
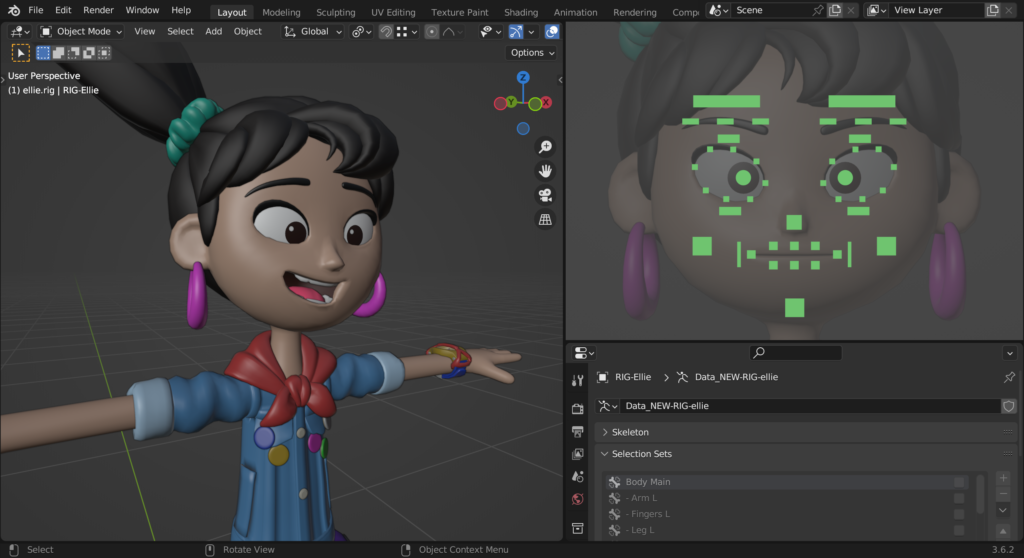
We want to have a system for bone pickers, so that animators can work faster and with a less cluttered 3D viewport.
And there are lots more ideas. Example-based drivers, multiple rest poses per rig, custom bone axes, editable motion paths, ghosting (also editable, of course), animation retargeting tools, dense animation workflow, tools for wrangling motion capture data, the list goes on.
So these are all ideas that we would love to do for Animation 2025. All by 2025?!? (To be clear: no, that’s not possible with only 2.2 FTE in paid developers). Well, let’s stop dreaming, step back, and look at…
2. The Concrete
So far the Animation 2025 project has already brought many improvements to Blender.
— Already in Blender
The features listed below are all already in Blender or will be released in Blender 4.1:
12x faster graph editor in Blender 4.0 (in this case, compared to Blender 3.6, YMMV).
→
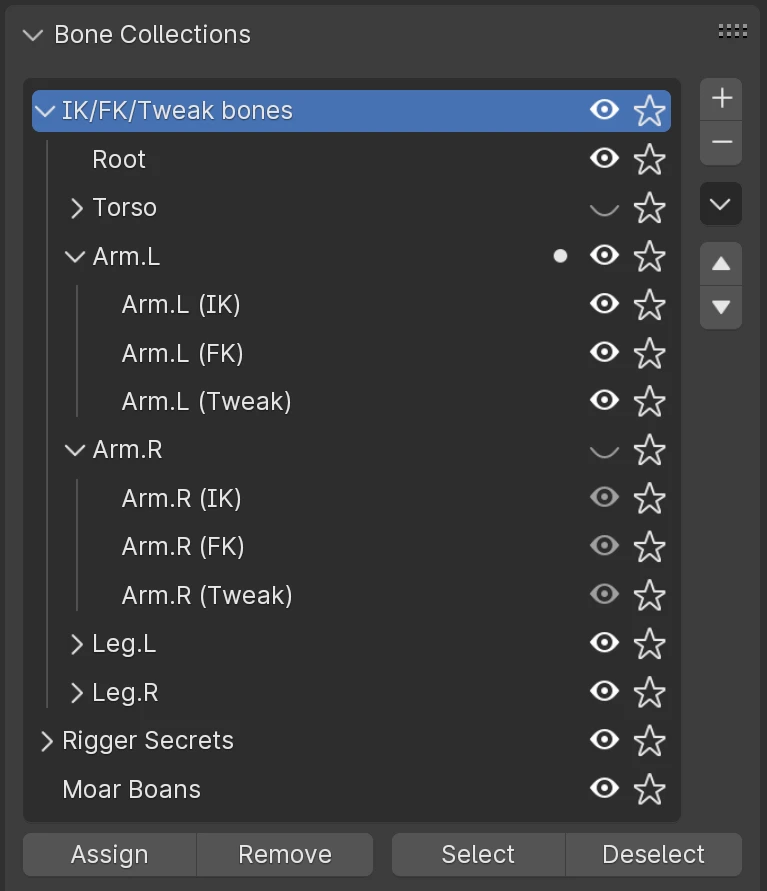
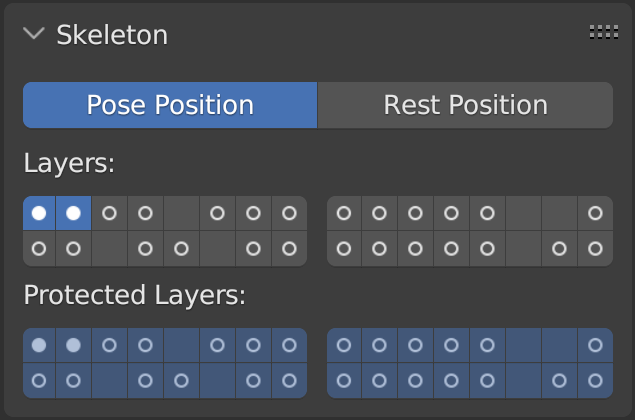
Blender 4.0 replaced the limited armature layers system with the more powerful bone collections, with nesting and more visibility options coming to Blender 4.1.
Many of the Animaide tools were brought to Blender natively. And there is more:
- Camera-relative motion paths
- Keying workflow improvements
- Weight paint mode selection tools
- “View in Graph Editor” on any property
- Copy Global Transform
- Configurable bone relationship lines
- “Parent” transform space
- New F-Curve smoothing operators
- NLA is now fairly usable
- Multi-editing of F-Curve modifiers
- Bendy Bones better bendyness
— What we’re working on right now
Currently the Animation & Rigging module is working on a new layered animation system: Project Baklava. Why this name? Everybody knows that Baklava consists of two ingredients: layers, and deliciousness. And with ‘deliciousness’ we actually mean ‘Multi-ID animation’.
These two, Layers and Multi-ID animation, form the two pillars for a new animation system. More technical details of this system are described in Animation Workshop: June 2023.
The system itself will just be “Blender’s animation system” in the future. Baklava is the project name.
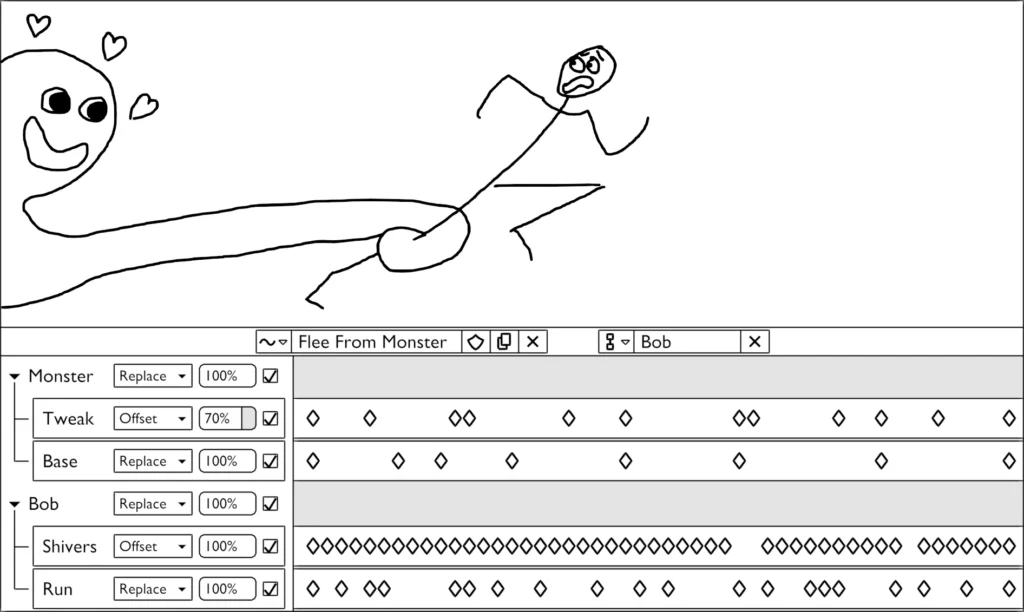
The above mock-up shows what this new animation system could look like. Two characters, the monster and Bob, are animated from the same Animation data-block. This means that trying out alternative takes for the same animation no longer requires swapping out multiple Actions; instead it can just be done by (un)muting different layers in the animation.
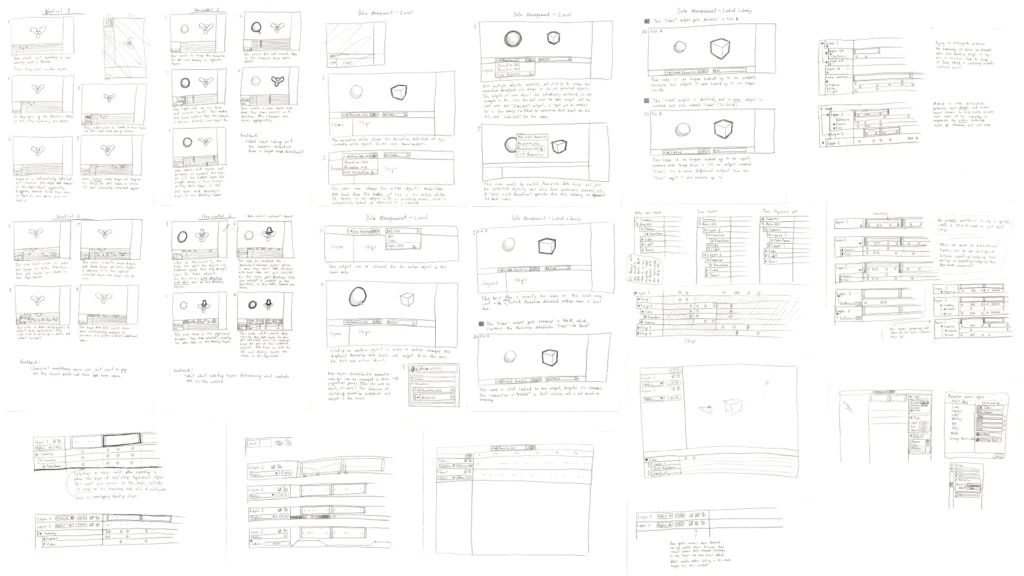
Nathan made a lot of UI/UX designs, including venturing into some further-future topics like animation-level constraints and swappable rigs. To see these designs in more detail, visit Initial UX design for the new Animation data model on Blender Projects.
In the mean time, Sybren has been working on implementing the data model. It consists of the Animation data-block, which is intended to replace the Action. At this moment the DNA and RNA code are present, and evaluation and simple mixing of layers works too. And, as you can see above, it can animate multiple objects simultaneously.
— Next Step for Project Baklava
The goal is to get this into animators’ hands as soon as possible. For this, a few things are still necessary:
- Make it possible to key things. The above animation was made via Python, which is suboptimal.
- Show the animation in the dopesheet & graph editor. This is relatively simple (famous last words), as the new
Animationdata-model still uses the same F-Curves. Any tool that can work with those could work with the newAnimationas well. - Just
deliciousnessMulti-ID, no layers yet. To keep the feedback loop as small as possible, we decided to focus on the biggest unknown first. And since we already have a decent idea about how layers should work, Multi-ID animation is prioritised.
— Further Steps
Once the Multi-ID animation is in, the efforts will shift towards more tooling, and layered animation.
- Migration tools: for merging multiple Actions into a single Animation. Or to bake down an Animation data-block into an Action per animated object.
- A new editor for layered animation. At first this will likely be a side-panel for the dopesheet. In the longer term, it should be an editor by itself that ideally can replace the entire dopesheet.
- Tools for merging & splitting: animators should be able to “play” with layers. It should be easy to split up layers by object, merge them down, split selected F-Curves off into a separate layer, etc.
- Tools for baking: it should be possible to tweak an animation by adding one or more layers on top, then bake that layer down while keeping the same animation.
3. The Management
“Make Blender ready for the next decade!” was Ton Roosendaal’s missive for the Animation 2025 project. Exploring this was a lot of fun, and brought us many great ideas (see 1. The Dream above). To keep things manageable, this is our proposal:
- Keep the umbrella goal of futurifying Blender’s animation & rigging systems.
- Rename what we’re doing now to “Project Baklava“. This reduces the work to a significantly smaller, and hence easier to manage, project with concrete steps & deliverables.
- Prioritise other “umbrella projects” as we go.
— The Planning
As we wrote above, one project at a time. Now it’s Baklava. We aim for inclusion in the main branch as an experimental feature in Q2 2024. The first ‘working state’ will be single-layer, multi-ID animation. After that we might add layers, but maybe we’ll switch to bone pickers or rigging nodes. The point is: we don’t have to wait until Animation 2025 is “done” to refocus and work on what is most needed at the time.
Stay in the Loop
Keep an eye on the Animation & Rigging module meeting notes. These are the best source of information of current development and decision making. Or maybe even join a meeting?


buy the Autodesk maya, close this case. good work, all team.
okay
I understand what to do
I got it
cool
Rigging should be #1 priority in Blender, it didn’t evolve much and still far behind to be honest, without great rigs Animators will suffer, but of course they’re equally important.
I don’t mean to discourage anyone but rigging in Blender from scratch right now is difficult, also most rigs suffer from clutter in the viewport so bone picker and so on are very well welcomed.
also please put some focus onto rigging cartoony faces, to be able to have like ribbon setups in the same armature for example…etc
Please multi subdivide level for ShapeKeys.
Rig Nodes should save us the trouble of placing Armatures in Blender,
Rig Nodes should be accessible via Add Object/Bone Constraint just like Geometry Nodes via Add Modifier.
To whomever suggested to add a bone picker built-in blender itself, I wanna marry you.
You’ll have many people to marry ♥
Dr. Sybren, have you seen Ragdoll Dynamics? They incorporate physics into posing and animation, making it much easier. Are there any plans of such features being implemented in Blender natively?
There are no plans for this. That’s not to say it’ll never happen. But first let’s get manual rigging & animation working as well as we can. Even with the best automation tools, they’ll never do exactly what you want, and you’ll always have the need to animate & adjust manually.
To put it differently: good manual animation & rigging tools will help everybody who wants to do animation & rigging in Blender.
Could blender use this project to switch to a full Y up axis (optional) coordinate system?
The Z up is really a bad standard in animation.
It screws up many workflows and fore tricks in many places instead of “just works”.
There actually is no standard. Different software uses different coordinate systems
For example, Maya, Unity, Houdini, and other software uses Y up, while Blender, Source, and Unreal use z-up.
And Z-up isn’t bad at all. It’s just something you have to learn jumping between software. It’s the natural coordinate system of the real world.
No, the list is not Maya, Unity, Houdini vs Blender, Source, and Unreal
The real list is Y up:
Maya
Unity
Houdini
Cinema 4D
Godot
Modo
Clarisse
Zbrush
Mudbox
Rhino3d
Gaffer
Substance Painter
Katana
Vs Z up:
Blender
3Ds Max
Unreal
Source
The standard choice is clearly on Y up side… especially for animation.
After all, like you said, that is just a letter to swap, then why not implement it in Blender and finally give us the freedom of choosing what we are comfortable with in the preferences just like the right click select or the shortcuts ?
Dozens of thousands of users should not be stuck with a coordinate system they do not like, simply because a very few people in Amsterdam are fine with Z up and dismiss other people feelings and needs.
> After all, like you said, that is just a letter to swap, then why not implement it in Blender and finally give us the freedom of choosing what we are comfortable with in the preferences just like the right click select or the shortcuts ?
Because there’s a serious cost to this. When making this configurable, tools cannot just work the way they expect to, and the Blender code will be riddled with “if Z=up then do this, else do that” constructs. It’s a lot of bug-prone work, and while that’s being worked on, other development will stand still. I don’t think it’s worth the cost.
Or you can treat the coordinates with an agnostic convention like
vector axis is axis.0, axis.1, axis.2 internally and remap
axis.1 = Y or Z, and axis.2 = Z or Y depending on the chosen coordinate system.
Maya can switch to Z-up with a single click for the few people who want such a thing, so, do you mean Blender code is not as good and modular as Maya’s one ?
As I wrote below as well: For me Y=up has always seemed strange and arbitrary, at least when we’re talking about a coordinate system for a virtual environment. When you simplify the surface we walk on, and look at it as a plane, then there is no real difference between left/right and forward/backward. It really depends on which direction you’re facing. But there is one direction that is special, and that is the same for everybody walking on that plane: the normal of the plane.
Another way to look at this, is that (again, in a virtual world/environment) projecting on a vertical plane is arbitrary. There is no one vertical plane that is special to that world, at least not until you define arbitrary updown/leftright axes. Projecting onto a horizontal plane, however, is different, as the normal that defines that plane is special: gravity.
So that’s why, for me, it makes sense to have Z = up, and XY = the ground plane.
Of course for projecting onto a 2D screen it makes sense to align the XY plane with the screen itself, and then Z naturally becomes “depth”. This also follows the same logic as I describe above: XY spans the plane onto which it’s sensible to project things, and Z is the projection axis.
Will the new system allow to offset the animation of instances without having to make them a single user? This is very useful for motion graphics work, where you create for example a line growing from left to right, then instance this line several times to fill the screen, and then offset the animation a few frames on each instance, but still any changes made to the original (model and animation) one will be reflected on the others.
The same would be super useful for crowds for example, so you could instance the same char through GN and have their animations start when they’re created on the timeline, instead of having a fixed start and end frame.
This is a Hard Problem. Time-offseting instances feel logically simple (the UI you’d need could be super simple – just a single slider), but the rendering and display is more difficult: rendering, whether to viewport or output, considers instances to be identical entities; that’s kinda the whole point. Only need to store that single tree mesh in memory once, but we’ll display it in multiple locations at the same time.
If the tree’s animated, and you now want that instance over there to be at a different frame from the one over here – OK, they’re no longer identical instances. 1000 trees that are identical: easy to do, each frame render depends on 1 mesh. 1000 animated trees in sync with each other: just as easy, 1 mesh, even though it’ll be a different mesh when we start rendering the next frame. 1000 animated trees that are each at a different point in their animation… you’ll need either 1000 different meshes in memory, or however many meshes (frames) make up the tree animation, whichever is lower.
In practice you’d probably need to say “ok I may have 1000 trees, and I don’t want them to look in sync, but I can divide them into 5 groups, each group with a different time offset. That’d mean 5 tree meshes in memory for any given frame, and the random scattering/rotation of the trees would help hide repetitiveness.”
It’s a solution – my 1000-tree forest feels random again – but it takes a bit more thinking about and setting up than just “each instance has a different time offset”.
It’s been one of the hardest things to get my head round throughout my CG career: conceptually simple things (like motion-blur – simple concept to visualise/understand) can be surprisingly complex to achieve when you get down to actual execution. When you have to consider things like “will all this data fit on my GPU” ;)
I’m don’t know how the technical side of things work, but following the example of the trees, if the action / animation info associated to the tree instance is already stored in memory, wouldn’t be possible to just use that information and offset it on the timeline for each instance? Again, I’m not trying to say it’s easy to implement but there are other programs that can make it work without a big performance hit…
Any chance to have a more Maya-like system in which you can point joint chains toward any axis, instead of being forced to have bones aligned to Y-axis only as in the current Blender implementation?
By now, we can’t really edit and reimport any existing skinned mesh from, for example, an Unity project since the avatar refers to Maya bone orientation.
This is what the “Custom bone axes” point refers to in the blog post.
We need a real Y up coordinate system… seriously.
If you want to win the heart of pro (maya) riggers and animators, you have to use the Y up standard fully!
That’s even how basic math works: In 7th grad when you do f(x) = 3x + 2, the ordinate, is it called Z? No, it’s literally called Y-axis, because up = Y.
Just because a few devs in the 90s made the mistake because they started their software as a 2d top down, then hacked the 3rd axis, doesn’t mean this mistake should last forever.
To a large extent, Y-up vs Z-up is arbitrary. When I’m working on graph paper at my desk, Y is pointing forward away from me, not up. But when I’m working on a chalk board or white board, then Y is up. Neither is more natural than the other.
So it’s not that “a few devs in the 90s” made a mistake. It’s that different devs made different arbitrary decisions, and now we have a bunch of incompatible coordinate systems. (Also see: left-handed vs right-handed coordinate systems.) Which is admittedly unfortunate, and would be good to resolve. But it isn’t because any of the choices are more “natural” than the others.
For me Y=up has always seemed strange and arbitrary, at least when we’re talking about a coordinate system for a virtual environment. When you simplify the surface we walk on, and look at it as a plane, then there is no real difference between left/right and forward/backward. It really depends on which direction you’re facing. But there is one direction that is special, and that is the same for everybody walking on that plane: the normal of the plane.
Another way to look at this, is that (again, in a virtual world/environment) projecting on a vertical plane is arbitrary. There is no one vertical plane that is special to that world, at least not until you define arbitrary updown/leftright axes. Projecting onto a horizontal plane, however, is different, as the normal that defines that plane is special: gravity.
So that’s why, for me, it makes sense to have Z = up, and XY = the ground plane.
Of course for projecting onto a 2D screen it makes sense to align the XY plane with the screen itself, and then Z naturally becomes “depth”. This also follows the same logic as I describe above: XY spans the plane onto which it’s sensible to project things, and Z is the projection axis.
There is no difference between the Z up and Y up. They are just labeled by a different letter.
One of the things mentioned on the conference was VR usage for animation, is this still a thing? Will rigging nodes b a completely new thing or will it b integrated in geo nodes?
Of course it’s still on our minds. It’s a lower-priority topic for the developers on the Blender payroll, though, simply because there are so few people with VR sets. I wouldn’t be surprised if, once rignodes are actually usable, people find ways of connecting those to all kinds of external devices.
While you’re redesigning it all, it would be rather nice if we didn’t have to change editors just to access the playback controls.
There’s not reason (in blender 4.0, for example), for the controls to NOT be at the top of the graph editor. I should be able to play/navigate forward/back regardless of which “style of animation graph” I’m working in.
I guess you already know about the RigUI addon which worked in pre 2.8. I remember porting it to 2.8 and was working nice. It stunningly well
> In the mean time, Sybren has been working on implementing the data model. It consists of the Animation data-block, which is intended to replace the Action
Does that mean it will be possible to finally have more than just the global animation (or transform only actions), and be able to export these as well?
If so, this is insane! Blender would finally become usable for animation for video games (or any target outside of Blender)!
In order to prevent spam, comments are closed 7 days after the post is published. Feel free to continue the conversation on the forums.